
5 Church Canvas Features You May Have Missed
Discover five overlooked Church Canvas workflows that help church teams explore ideas faster, preserve strong designs, and create more consistent graphics.
Most users learn Church Canvas as a straight line: write a prompt, generate an image, and download the result. That path works, but it leaves much of the product untouched. The richer workflow is a loop: explore, remix, repair, reuse, and refine.
The five features below matter because they shorten the distance between a promising draft and a design a real ministry team can confidently publish. None of them needs to be used on every project. The advantage is knowing which tool solves the moment directly in front of you.
1. Grid Mode turns one idea into a wall of possibilities
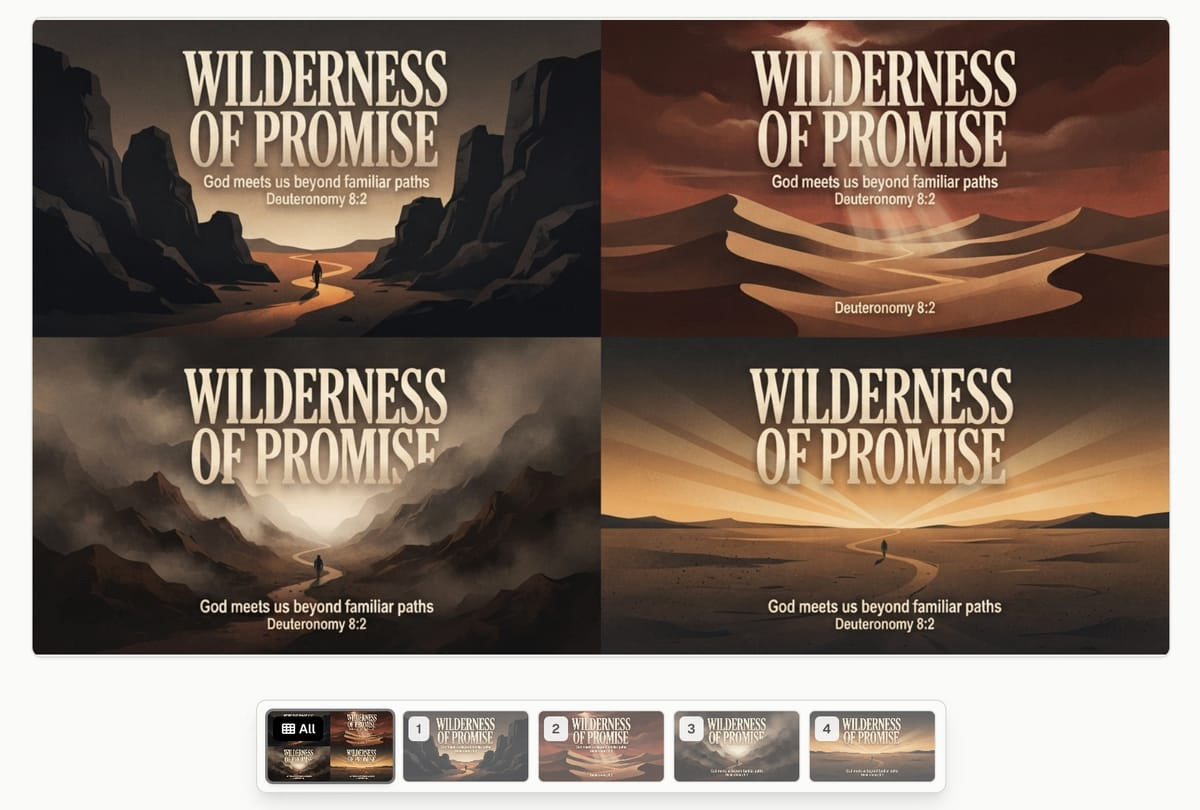
Grid Mode generates four or nine visual directions at once. You can compare them as a family, select the strongest tile, and upscale it for final use.
Most creative blocks are not really prompt problems. They are comparison problems. It is difficult to know whether an idea is right when the first image is the only image on the table. Grid Mode changes the question from Did the AI get it right? to Which direction is ready to finish?
A 2×2 grid gives you four fast alternatives. A 3×3 grid gives you nine. The tiles are intentionally exploratory rather than final-resolution deliverables. That makes the feature especially useful at the beginning of a sermon series, during seasonal campaign planning, or whenever a team needs to agree on a visual language before investing in polish.
The best workflow is simple: start broad, select the strongest composition, then choose Upscale. Upscaling keeps the exact tile you approved while preparing it for final use. Regenerate only when the concept itself still needs a different subject, composition, or visual treatment.
Where to find it
Open Create, choose your model controls, then select the grid icon. Start with a 2×2 grid for quick comparison or a 3×3 grid when the creative direction is still wide open.
2. Community Remix makes every great design a starting point
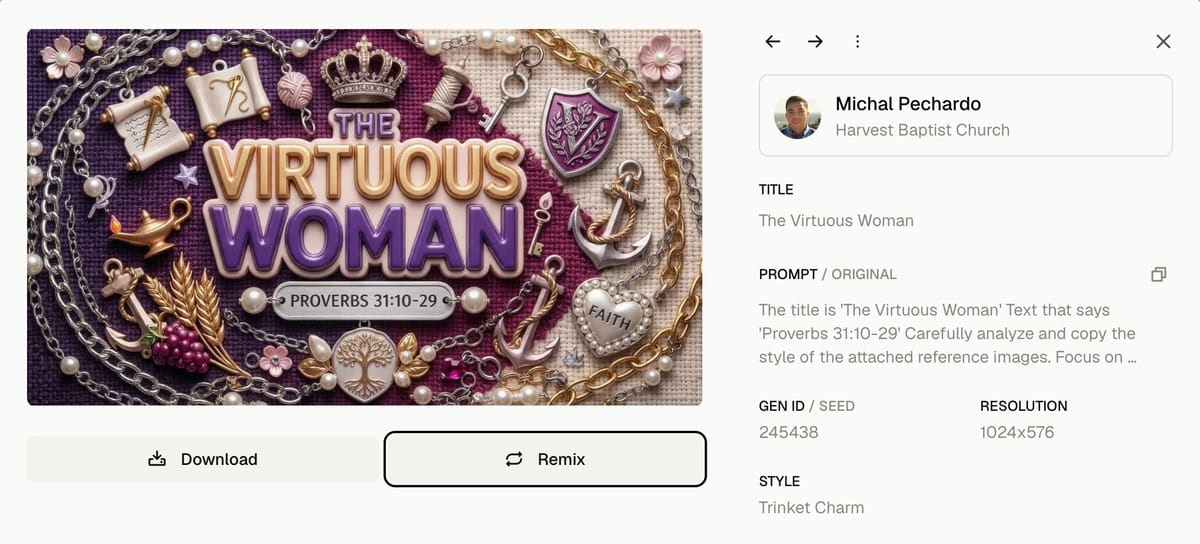
Community Remix carries a community design’s visual reference, prompt, title, and aspect ratio into a fresh generation. You can continue the idea without rebuilding the setup from scratch.
A gallery can easily become a place where inspiration goes to stop. You scroll, save a few references, and still return to an empty prompt box. Community Remix closes that gap. When a design is close to the mood you need, Remix moves its useful ingredients into Create so you can continue the thought rather than merely admire it.
This is not the same as copying a finished graphic. The reference image guides the next generation while the inherited prompt and format give you a practical foundation to revise. Change the sermon title, introduce a different symbol, shift the season, or ask for a new composition while preserving the quality that caught your eye.
For small creative teams, Remix can also become a lightweight collaboration pattern. One person establishes a direction, another explores adjacent variations, and the team builds a visual family without passing around complicated prompt documents.
Where to find it
Open the Community, select a design, and choose Remix. Revise the inherited prompt so the new version fits your message and ministry context.
3. Edit with AI is a compact post-production suite
Correct text, remove an object, revise an image with a prompt, change the crop, build slides, or upscale the result without throwing away the entire design.
The expensive instinct in generative design is to start over whenever one detail is wrong. A nearly perfect image with a misspelled word, distracting object, or inconvenient crop does not need another dozen generations. It needs a targeted edit.
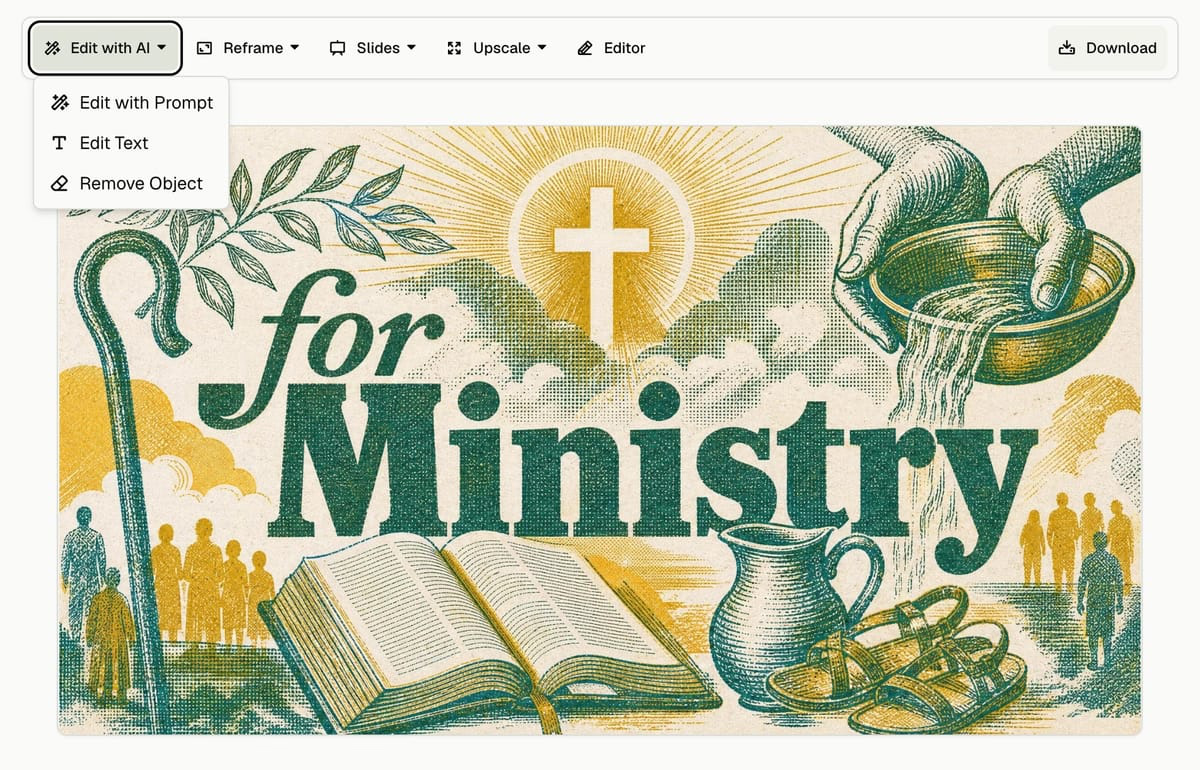
Open Edit with AI and the general magic-wand label reveals three distinct jobs:
- Edit with Prompt makes a controlled visual change.
- Edit Text detects words in the artwork and lets you replace the specific lines that need correction.
- Remove Object lets you mark an unwanted element and rebuild only that area.
The surrounding toolbar extends the same preserve-what-works philosophy. Reframe adapts a composition to another aspect ratio. Upscale prepares a chosen design for larger output. Slides can turn a title graphic into a connected presentation direction. These are finishing tools, but they also protect the creative progress already inside the image.
A practical Sunday workflow
Imagine that your team generates a sermon title graphic with the right mood and composition, but one subtitle is misspelled and the social crop cuts too close to the subject. Fix the wording with Edit Text, then use Reframe for the social version. You keep the approved creative direction while solving two specific production problems.
4. My Assets is a lightweight brand kit
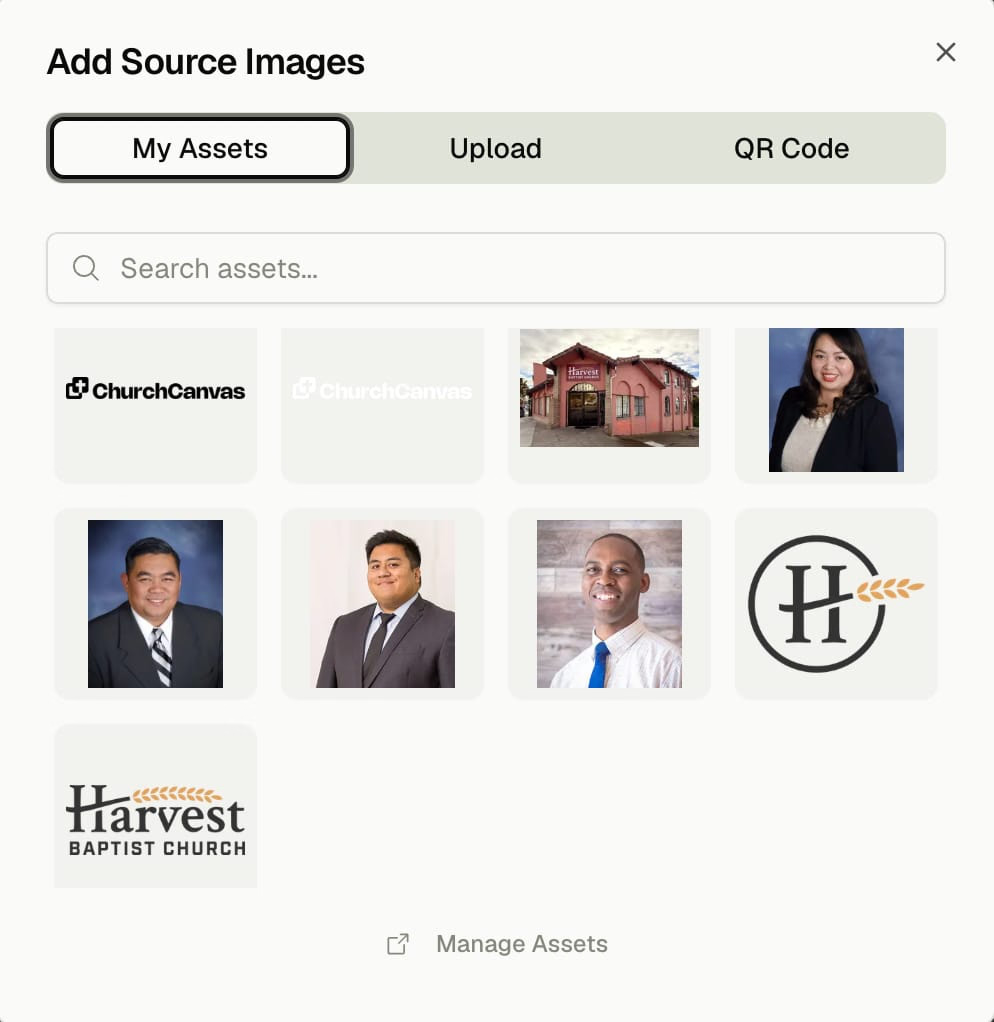
My Assets can organize logos, people, buildings, backgrounds, graphics, and QR codes, then reuse them as source material inside new designs.
Consistency is rarely achieved by asking AI to remember your church. It comes from giving the creative process the same trusted ingredients every time. My Assets provides a home for those ingredients: the correct logo, the right building photo, a pastor portrait, campaign textures, ministry marks, and frequently used graphics.
The key is that the library is connected to creation. In the Source Images panel, you can pull an existing asset directly into a generation instead of downloading it, finding it again, and uploading it as a one-off reference. You can also upload something new or generate a QR code in the same flow.
A little curation pays off quickly. Use clear names, assign the right categories, and keep only approved versions. The result is a shared visual vocabulary that makes every future design faster and reduces the risk of an outdated logo or inconsistent image slipping into Sunday’s announcement deck.
What belongs in the library
| Asset type | Useful examples |
|---|---|
| Logos | Primary logo, icon mark, ministry logos, approved color versions |
| People | Pastor portraits, staff photos, guest speaker headshots |
| Places | Building exterior, sanctuary, kids area, community locations |
| Brand visuals | Textures, backgrounds, recurring campaign elements |
| Utility graphics | QR codes, maps, giving marks, event badges |
5. The prompt assistant helps before you know what to type
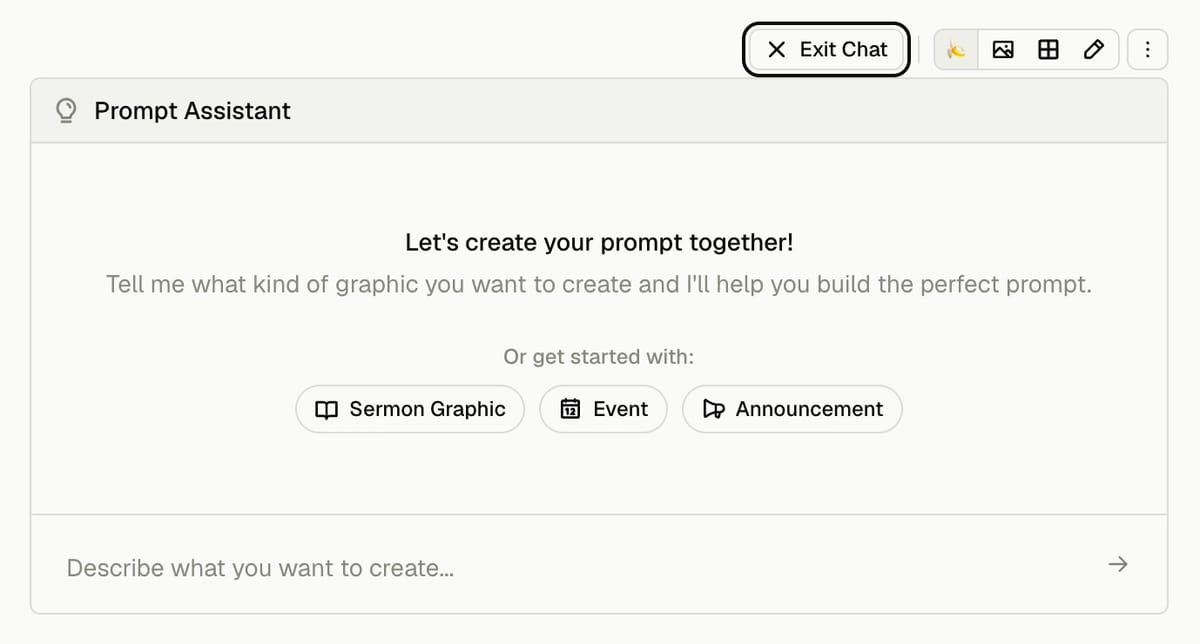
Use a conversational assistant to shape the brief, or generate visual concepts that can be inserted into your prompt with one click.
The hardest prompt is often the first sentence. You may know the sermon theme and still have no clear subject, metaphor, atmosphere, or composition. That is exactly when the prompt-building tools are most valuable, before you have already written a detailed art direction brief.
Assistant opens a guided conversation that helps turn a loose concept into a usable prompt. The smaller Ideas control reads the prompt you already have and proposes visual directions that can be inserted directly. It is useful when the wording is accurate but the image still feels obvious or generic.
The goal is not to make the prompt longer. It is to make the visual decision clearer. A strong prompt identifies the essential subject, the emotional tone, the composition, and the text that truly belongs in the image. Let the assistant supply options, then edit with the judgment only your ministry context can provide.
Start with a simple ministry brief
You do not need to write like an art director. Begin with the information your team already knows:
- Message: What is the sermon, event, or announcement about?
- Feeling: What should someone feel when they see it?
- Subject: What person, place, object, or symbol could carry the idea?
- Format: Is this for a sermon slide, social post, story, or print piece?
- Text: Which words must appear in the final design?
Use Assistant when one of those decisions is missing. Use Ideas when the brief is accurate but the visual concept needs more range.
A better creative loop
These features are most useful when they become a repeatable sequence rather than a collection of tricks.
Explore the direction
Use Grid Mode when you need several visual answers, then select and upscale the strongest tile.
Borrow useful momentum
Start with Community Remix when an existing design is already close to the tone you need.
Repair the local problem
Edit text, remove an object, or revise one detail instead of replacing the whole image.
Reuse approved assets
Bring trusted logos, photos, and brand elements into the next design from My Assets.
Clarify the brief
Let Assistant or Ideas expand the options, then use human judgment to choose what fits your church.
The goal is not to use every tool on every design. It is to recognize the moment each tool was designed to solve. Start with the feature you have never tried, and let the workflow earn it a permanent place in your process.
Church Canvas becomes more useful when it is more than a generator. Grid Mode helps you choose a direction. Community Remix helps you begin with momentum. AI editing protects good work. My Assets keeps the team consistent. The prompt assistant turns a loose ministry idea into a visual brief. Together, they give volunteers a practical creative system from the first concept to the final Sunday graphic.
Church Canvas features FAQ
What is Grid Mode in Church Canvas?
Grid Mode generates four or nine visual directions from one prompt so you can compare concepts, select the strongest tile, and upscale it for final use. It is most useful early in a project when you need options before committing to one direction.
Can I remix a design from the Church Canvas Community?
Yes. Community Remix carries the design reference, prompt, title, and aspect ratio into a new creation. You can then change the message, subject, season, or composition while keeping the original direction as a starting point.
Can Church Canvas fix one part of an image without starting over?
Yes. Edit with Prompt, Edit Text, and Remove Object are designed for targeted changes. Reframe, Upscale, and Slides can then adapt or finish a design without discarding the parts that already work.
How should a church use My Assets?
Use My Assets as a shared library for approved logos, people, buildings, ministry graphics, backgrounds, and QR codes. Those files can be added as source images when creating new designs, which helps volunteers work faster and stay visually consistent.